Create an Account and Get Credentials – Aspose.HTML Cloud
It is quite easy to use Aspose.HTML for Cloud in your projects. But before you start, you need to create an Aspose Cloud Account and obtain Client Id and Client Secret.
1. Create a Free Account
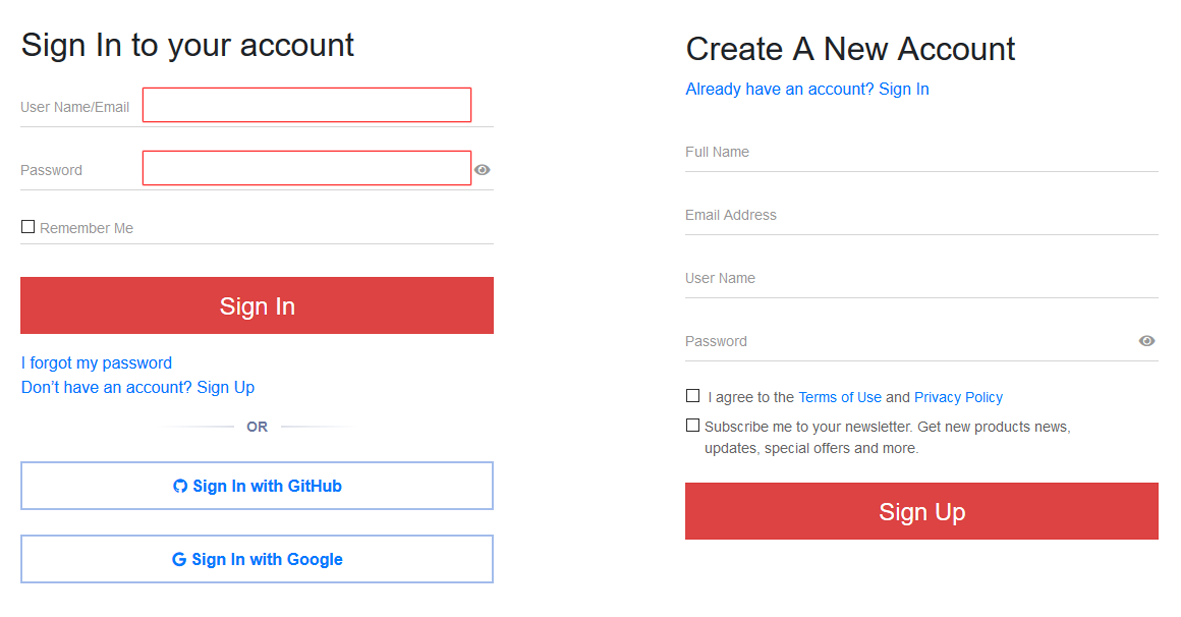
Please go to https://id.containerize.com/ to create a free Aspose Cloud Account. You will be redirected to Single Sign On application to authenticate to our services.
If you already have an account with our services, please specify the User Name/Email and Password and click on the Sign In button. If you don’t have an account with our services, click on the Don’t have an account? Sign Up button or Sign In using an existing GitHub or Google account. Please, provide the required information in the Create A New Account form in order to setup your account.
The following figure shows the online forms for Sign In and Sing Up:
You will be redirected to the Dashboard after the account is created.
2. Manage Your Account
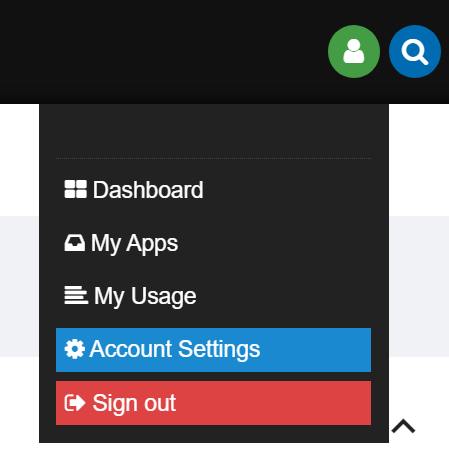
You can view and update your Account details. For this, you need to access your Aspose Account Settings by clicking the icon in the upper-right corner of the page. Select the Account Settings item from the menu bar.
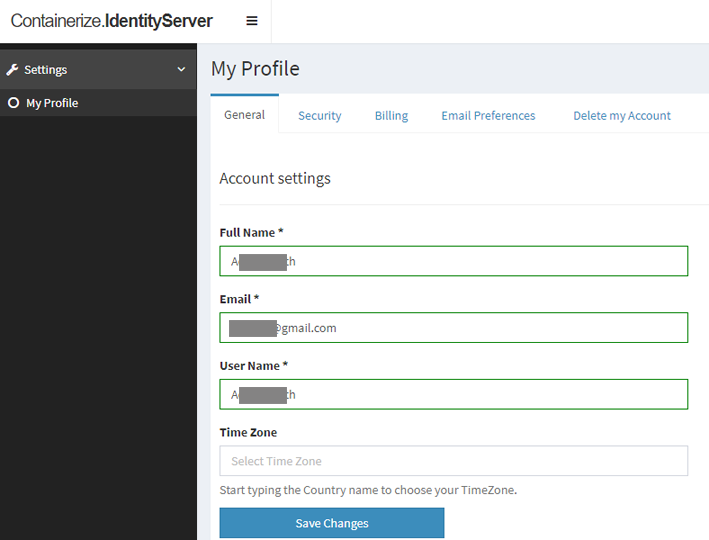
Next, in My Profile, you can choose General, Security, Billing, etc., for editing and setting. Make your settings and click the Save Changes button to confirm.
3. Create New App and Default Storage
Aspose appoints excellent importance to security concerns. We use the JWT token for the authentication and end-to-end HTTPS encryption to secure all client-server interactions. You should use a set of unique API Credentials (Client Id & Client Secret) to authenticate when calling Aspose Cloud API.
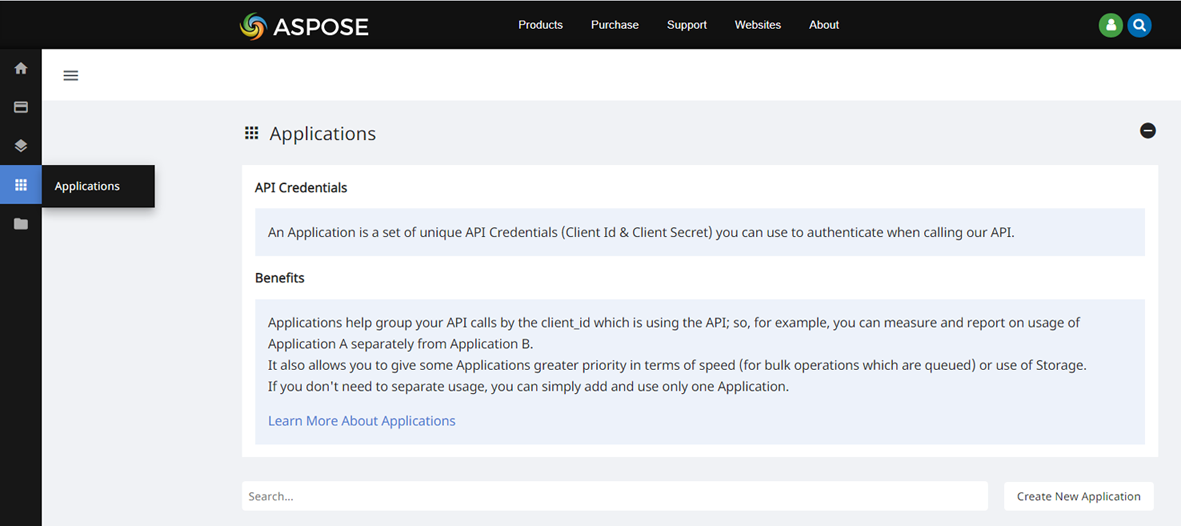
- Before you can make any requests to Aspose Cloud APIs you need to create an API client application. For this, log into the Dashboard, access the Applications page and click on the Create New Application button. For more detailed information see the Creating and Managing Application article.
- Next, you will be redirected to the page shown on the followed figure. You can enter an Application Name and Description for a new Application.
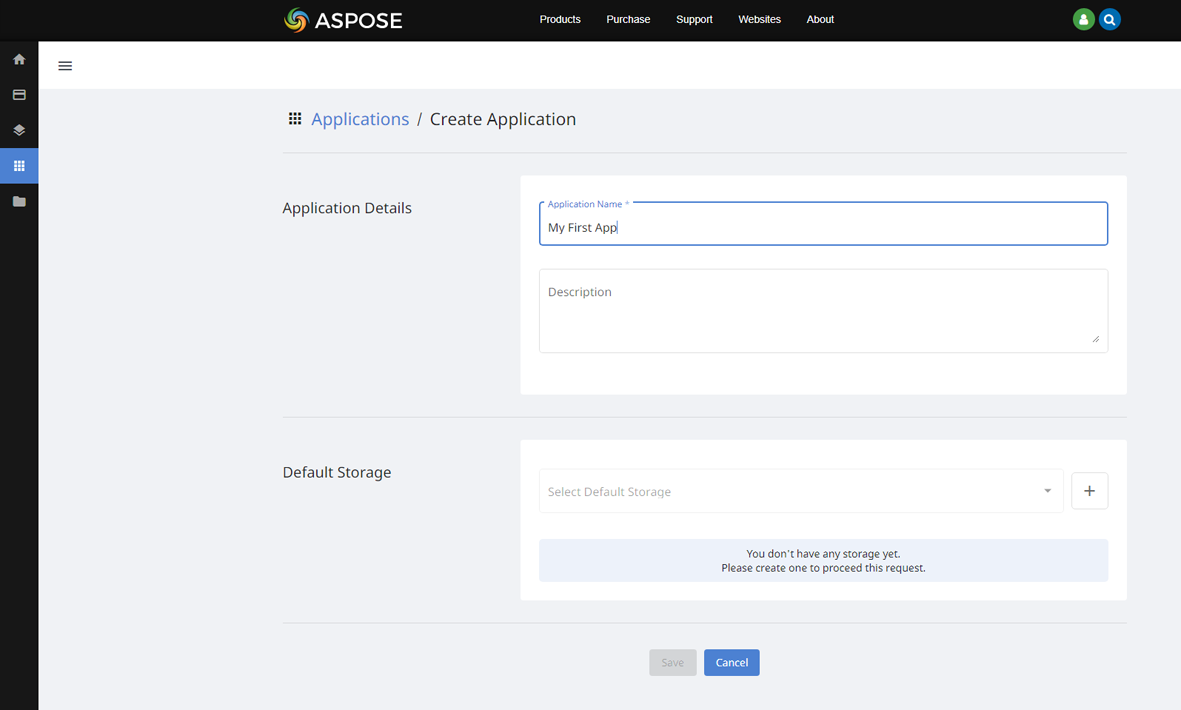
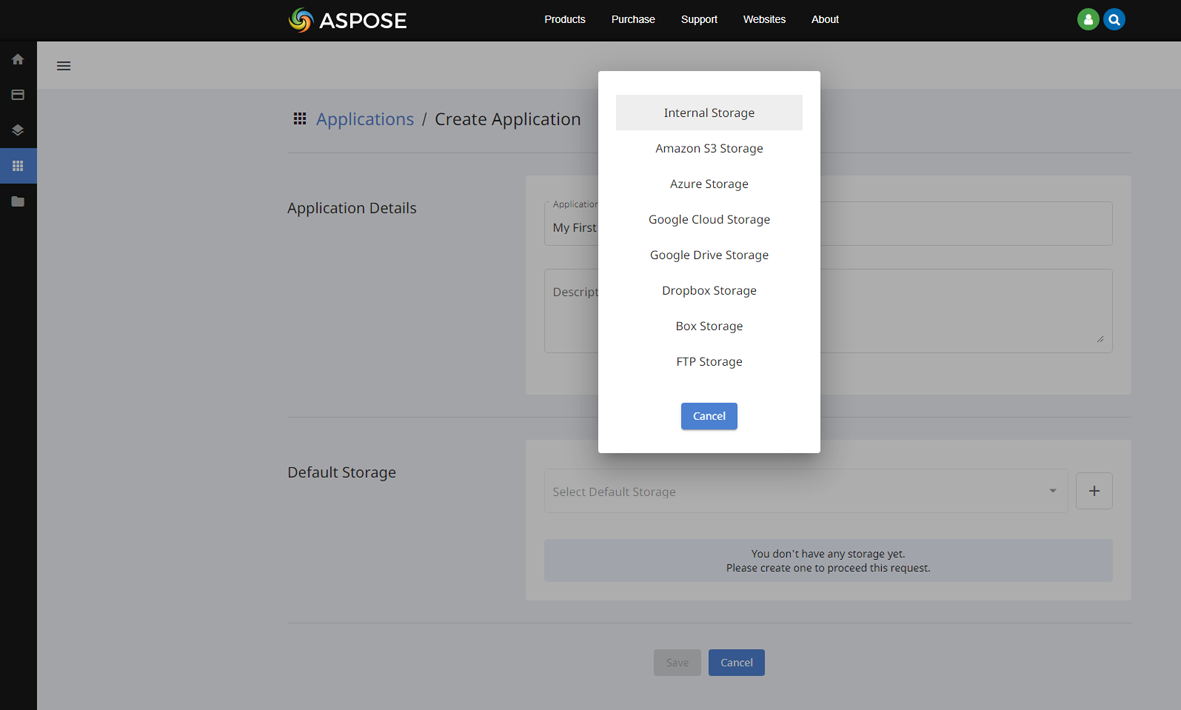
- You should click on the “+” button next to the default storage select box field for the storage creation. Select in the drop-down menu the kind of storage. Obey the instructions on the Creating and Managing Storages page to set up your first storage.
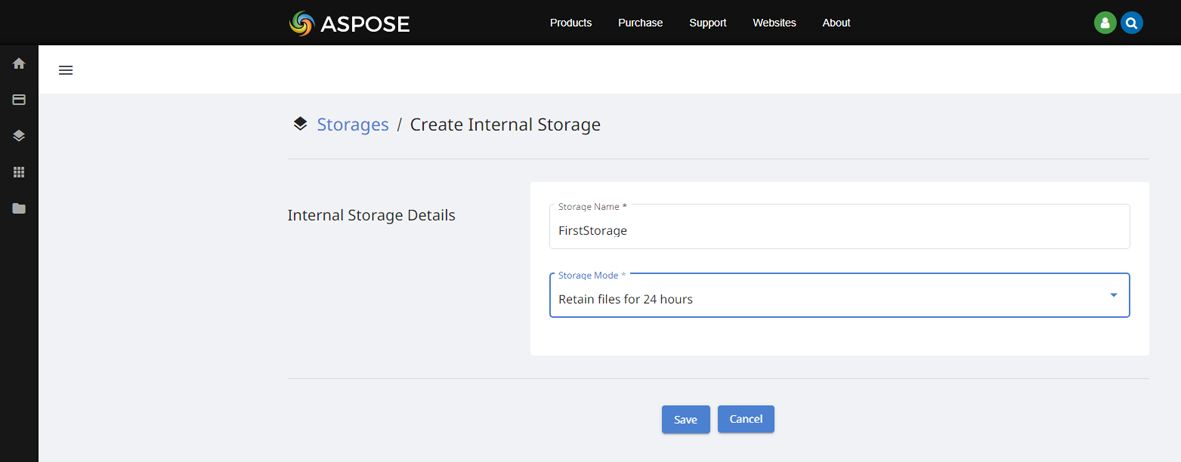
- If you choose the Internal Storage, give the Storage Name, select the Storage Mode and push the Save button. You will be redirected to the Applications Page. The newly created storage will be pre-selected on the Default Storage field since it’s the single storage you have.
4. Get Your Client Id and Client Secret
- Go back to the Applications page. At the bottom of the page, you find the My First App. Click this link to view and update your security credentials.
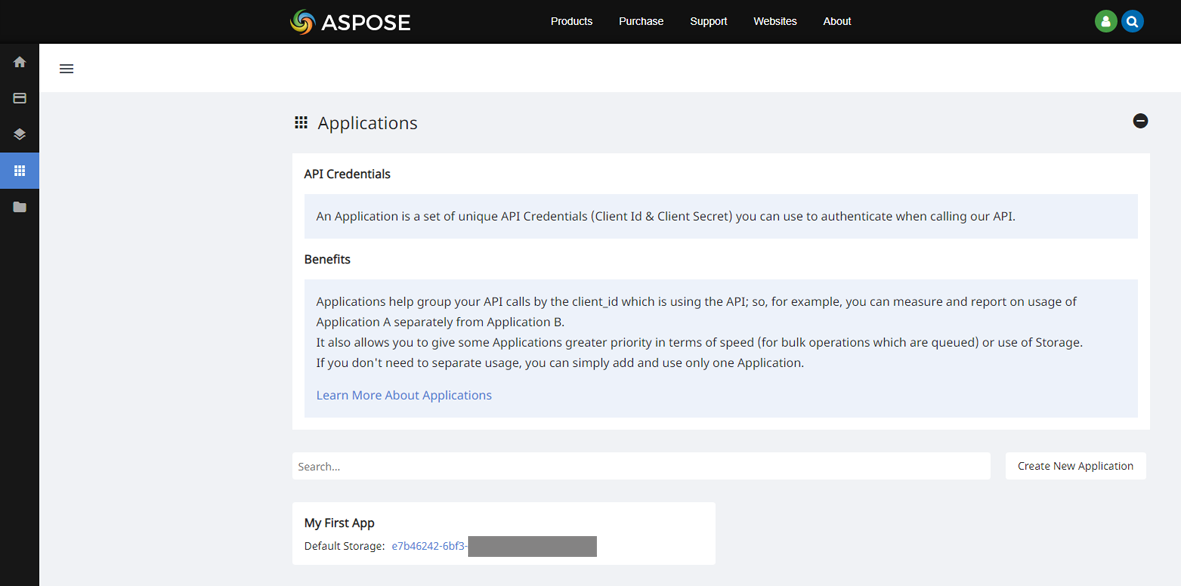
- Each Application has its own Client Id and Client Secret. These security credentials allow you to authenticate Aspose.HTML API calls.
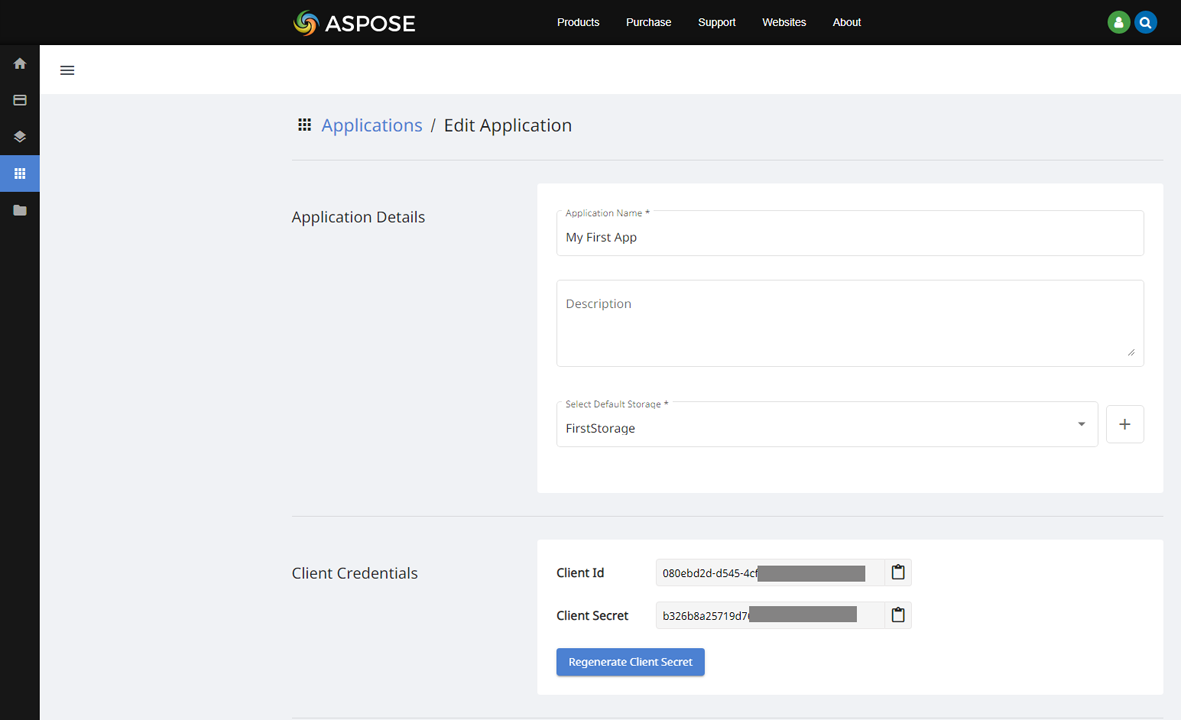
- You have successfully received your security credentials.
Note: If you, working with Aspose Cloud, come across the terms App SID and App key (secret key), they should be interpreted as Client Id and Client Secret respectively.
5. Install the SDK of Your Choice
Aspose.HTML for Cloud SDK is written in different languages; all you need to get started is to add our SDK to your existing project. Download Cloud SDK of your required platform as explained below: